
The holiday season is fast approaching, and one of the most cherished traditions is decorating your home with twinkling Christmas lights. Whether you're a seasoned decorator or a beginner, this step-by-step guide will walk you through the process of installing Christmas lights to make your home shine brightly and spread some festive cheer.
1. Dream up your display
Before you get started, you'll want to think about what parts of your home you want to decorate and how. This will help you make informed decisions once it's time to shop for your lights! Some great places to get inspiration is from Pinterest and online blogs.
Before planning your display, ask yourself this one important (yet often over looked) question: "Where are my outdoor power outlets?" This will help you plan where to start your light display, what kind of extension cords you might need, and how you can connect everything efficiently.
2. Measure your home and garden
It's pretty rare to have the original blueprint of your home, and shrubs and trees grow every year! So you're probably going to need to estimate the size of the features of your home you'd like to light up.
How to measure your home
You can easily measure your home's roofline without even stepping outdoors with the magic of Google Maps. We have a comprehensive step-by-step blog post about How to Measure Your Home's Roofline with Google Maps. This isn't a feature that's available for everyone - it's primarily available for areas closer to urban centres where 3D and Street View imagery of homes is more accessible.
If you're decorating smaller features like railings, windows, and door frames, these are easy to measure just using a standard tape measure. However, measuring your roofline can be more complicated. A measuring wheel can come in handy for taking measurements of your roofline from the ground. Before you head out to purchase one, ask around - there may be one available to borrow from a friend with a home service business or through a local tool library. If none of these are options for you, measure the length of your stride. Pace around your home, doing your best to follow the roofline.
How to measure your trees and shrubs
- If you're decorating a deciduous tree, check out our blog post How Many Lights to Put in Your Tree. This blog provides guidance on how to calculate how many strings of lights you'll need for your deciduous tree, whether you're going for the intricate trunk and branch wrap or simply wrapping around your canopy.
- If you're decorating a coniferous tree, we highly recommend the Christmas Tree Calculator on Omni Calculator. You'll just need an estimated height of the tree and the diameter of your tree to give you an estimate.
- Shrubs are fairly easy to estimate! A small shrub (~ 3 ft3) will generally accommodate 2-3 strings of our mini lights or C6 string lights. If you have a larger shrub, extrapolate from there! Really tiny shrubs like individual boxwoods will generally be fine with just one strand of lights. If the shrub is particularly delicate, you may want to use micro lights so as not to weigh down the branches.
All methods of measuring your home's roofline and landscaping features come with a risk of innaccuracy. For this reason, we recommend adding an additional 10-20% to your estimation and ordering with that amount in mind. We always say it's better to over buy rather than under buy. It's much easier to work with too many lights than it is to work with too few! Keep in mind, that every few years, the living features of your property are going to grow and may accommodate an extra string or two.
3. Gather materials
Materials don't just mean the lights themselves! Here's a list of things you'll want to have in order to install your lights safely and efficiently.
- Christmas lights - If you're putting a lot of time into planning your Christmas light display, it's worth investing in good lights. If you're shopping online, we recommend adding "commercial grade" or professional grade" to your search terms. Check out our blog post Eight Ways to Avoid Buying Bad Christmas Lights to learn about what to look for when buying Christmas lights.
- Clips and/or hooks - Not sure the best style of clip to use for your home? Check out our YouTube video Which Clip is Right for Me?
- Extension cord - If you want an extra tidy installation, consider making your own extension cord using our 100 ft power cord and zip plugs. Just be aware that these products are designed for seasonal use and should not be used for more than 120 days consecutively.
- Timer - Timers make your display super hands off after installation. You can opt for old-fashioned timers that you can program, or upgrade to a Bluetooth powered timer. The advantage of a Bluetooth timer is that you'll be able to program it from your phone, and turn your lights on and off with the touch of a button. Most Bluetooth plugs are not rated for outdoor use, so make sure it's protected from the elements.
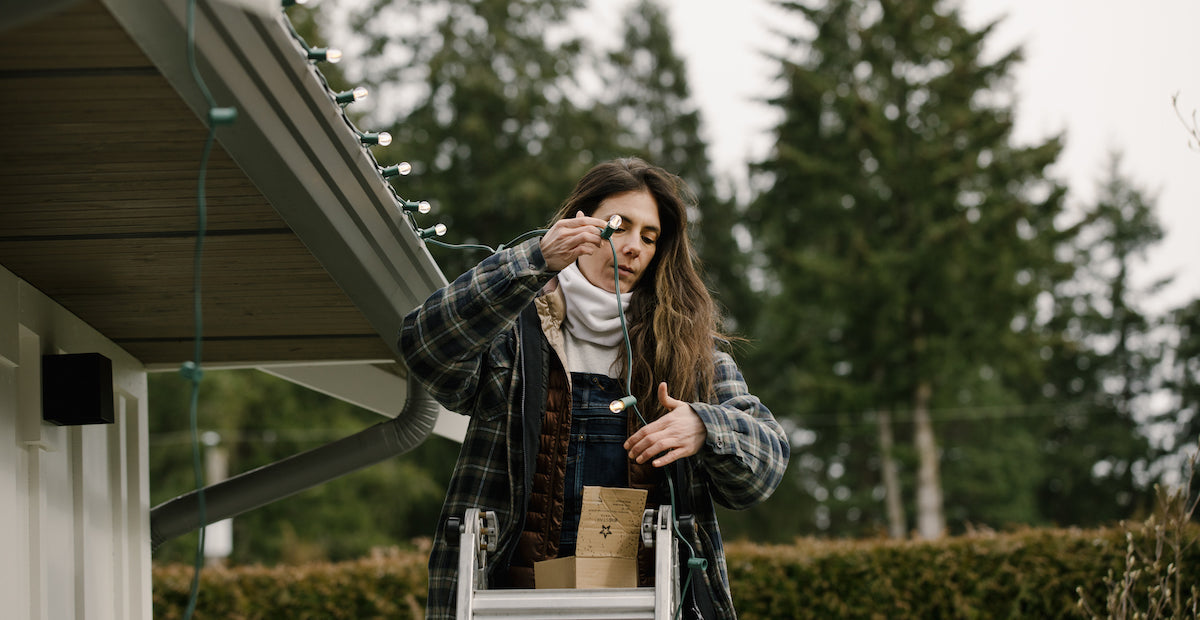
- Ladders - Always be sure to use the right ladder for the right job. A step ladder is great for single storey homes and decorating smaller features, but you'll need a bigger extendable 20 or 32 ft ladder for second stories and beyond. If you're decorating a big tree, you may want to consider an orchard ladder. If you're not happy on a ladder, consider reaching out to a local Christmas light installer to put your lights up for you!
- Light hanging poles: If you're decorating the canopies of large trees, we highly recommend you fashion yourself a light hanging pole. You can do so by picking up a painters pole from your local hardware store and pairing it with a pole hook or light feeder to make your job easier. You can also get creative here to save money - we've seen people use brooms to hang their Christmas lights!
- Other safety equipment - Gloves are great for keeping your hands warm during the install, and protecting you from any nicks you may get along the way. If you're installing in a tree, you'll be grateful to have some protective eye wear to save you from debris falling into your eyes or stray branches giving you an unwelcome poke.
4. Test your lights
There's nothing more disappointing than hanging your lights and then going to plug them all in, only to notice that a single bulb at the peak of your roof doesn't turn on. Before installing your lights, test each strand and repair or replace any components that aren't working.
It's fairly rare with modern LED lights due to their high efficiency, but you may also run into a scenario where having too many lights connected to one plug is causing your GFCI to short. If this is the case, you'll want to use a second outlet as a power source so as not to overload a single one.
5. Hang your lights
Remember what we said earlier about ladders and safety equipment? We meant it! Safety comes first.
Once you're comfortable you're doing the job safely, here are some of our top tips for hanging your lights:
- Start from your power source. This means you'll never run short before you get to power!
- Be consistent with spacing when decorating trees and shrubs. In order to achieve a tiday and attractive lighting display, you'll want to be sure you're wrapping the strings around in a relatively uniform way.
- Use clips instead of staples or nails if you can. It's always nice to have a temporary solution rather than leaving a permanent mark in your home. But whatever works best for you and your home! If you're using staples, remember to use insulated ones. Non-insulated staples may damage the wire casing and make contact with the wire inside, creating a hazard.
- To achieve a straight roofline look, we recommend using one clip at each bulb. If you're using a cradle-style clip, this means one clip attached to each bulb, and if you're using our Multi Clip, one clip attached to the wire next to each bulb.
- Avoid leaving electrical connections in wet areas. It's tempting to tuck plugs into a gutter to hide them, but resist the temptation! This can lead to corrosion and short your lights, ruining all of your hard work.
Need some more guidance on how to work with our commercial grade lights for your installation?
Read More: How to Install Big Star Lights on Your Home: A Step by Step Guide
6. Configure your timer
A timer allows you the freedom to just plug in your lights and forget about them. When configuring the timer, keep in mind that it's nice to give your wild neighbours some dark sky time.
The one exception to using a timer will be if you live in a really cold climate. Lights with thinly gauged wire won't work well in cold climates. If you have good, outdoor rated Christmas lights, we recommend you keep them on over particularly cold evenings. Keeping the power on will create a small amount of heat and keep the components from getting too cold.
7. Enjoy!
Installing Christmas lights is a fun and rewarding holiday tradition that can instantly transform your home into a winter wonderland, brightening an otherwise bleak season. With a design plan, the right materials, and a little bit of patience, you can create a stunning display that will brighten the spirits of all who pass by. So, gather your lights, follow these steps, and get ready to spread the joy of the sesaon!